Tuesday, March 7, 2017

MY 1959 KITCHEN REMODEL

After a long year of dust and frustration, my 1950s kitchen is finally finished!
We updated the tiny bathroom off the laundry room as well. Pictures coming soon for that project.

Before:                                              

After:


:

Thursday, August 6, 2015

A Blueberry Picking We Shall Go...

Saturday morning we went to a local blueberry farm to pick fresh organic blueberries.


 Paige and Parker are already pros, they had been the weekend before. They showed us where the perfect blueberries were.

 But they had to be tasted...just to make sure :)

 
And what do you do with fresh blueberries? You make pie!
.                  
                                                         Blueberry Crumb Pie

1 (9 inch) unbaked pie crust                        
1/2 cup white sugar                                      
1/3 cup all -purpose flour                            
2 Tbsp cornstarch                            
1 Tbsp fresh lemon juice
5 cups fresh blueberries

For the crumb topping
1 cup brown sugar
1 cup all-purpose flour
1/4 cup cold butter, diced

Preheat oven to 375 degrees.
Place pie crust into a 9 inch pie plate. In a large bowl, stir together the sugar, flour, and cornstarch. Mix in the lemon juice. Add the blueberries and stir gently. Pour blueberries into the unbaked pie shell.
In a medium bowl, stir together the brown sugar and flour. Add the butter and mix with a fork, or use the paddle attachment in a stand mixer. Mix until crumbly. Spread evenly over the blueberries.
Bake for 40 minutes, until topping is browned. Cool on wire rack.                            

Saturday, August 1, 2015

Hello, Again...

I can't believe it's been almost five years since my last blog post! So many changes in the last five years, all for the good! My poor long lost, neglected blog has been in the back of my mind. I've always had the intention of coming back to it, it's been way too long!
I've picked up a few interests along the way... I hope to share some of them, and of course my love for cooking, baking, decorating, and organizing. Hopefully I can bring some life back into my little corner of blog land :)
Please bare with me while I reaquaint myself, and I promise to have a new post up soon! Here is a sneak peek...

Tuesday, November 2, 2010

Chandelier Inspiration

So now I'm thinking this chandelier might look even better in the dining room???

Monday, August 16, 2010

Living Room

Still settling in...


My little reading corner...found the yellow flower pillow at Target.
We do not have a bar area in this house, so now we have four bar stools from Ikea that I've been trying to be creative finding places for.

Saturday, August 14, 2010

Pendant Lighting

I'm thinking this pendant light from Pottery Barn might work out really well over the table...


What do you think?

Tuesday, August 10, 2010

That Martha...

Has everything!!! When did this happen? Martha has a line of pet supplies at Petsmart!
Love this little bed, I think both of our dogs could fit in it together.


A bath tub for your puppy!

And a tote for supplies!


Treat Jars...love the Martha blue!

Wednesday, July 21, 2010

Sneak Peek

Still getting things put away and organized. Hopefully this weekend I will get things hung on the walls. I just realized... in this picture you can see entry way, dining room and kitchen haha!

Monday, June 21, 2010

Cake Balls and Oreo Truffles

I have been practicing Bakerella's Cake Balls. She makes it look so easy... and she is SO creative. I'm still working on trying to get mine smooth~
And these are Bakerella's Oreo truffles. Even easier than the Cake Balls, and only because you don't have to bake a cake :)

You can find the recipe for the Cake Balls here. You can use any cake mix/frosting/candy melt combo that you like.
And the recipe for the Oreo Truffles here.

Friday, June 18, 2010

Home Sweet Home

Our new digs
So cottagey! The yard needs some TLC, but we'll get it in shape :)


I love all the windows, and the corner window in the family room is great.

Yay, gas stove and updated kitchen.

The washer and dryer have to go at the end of the cabinets, the other choice is down in the basement...I don't think that sounds like too much fun, this will be way more convienent.


I love the charm of these old houses... notice the archways? This is taken from the family room looking into the dining room, and then the kitchen. (obviously haha!)
So happy to have hardwood floors! No carpet, yay!!!


Family room corner window.


Family room, taken from the dining room.
I'm looking forward to decorating. The backyard is the size of a small park, also in need of some TLC, but a place for a garden :) Rosie and Roxie are going to love it! More pictures to come.

Monday, June 14, 2010

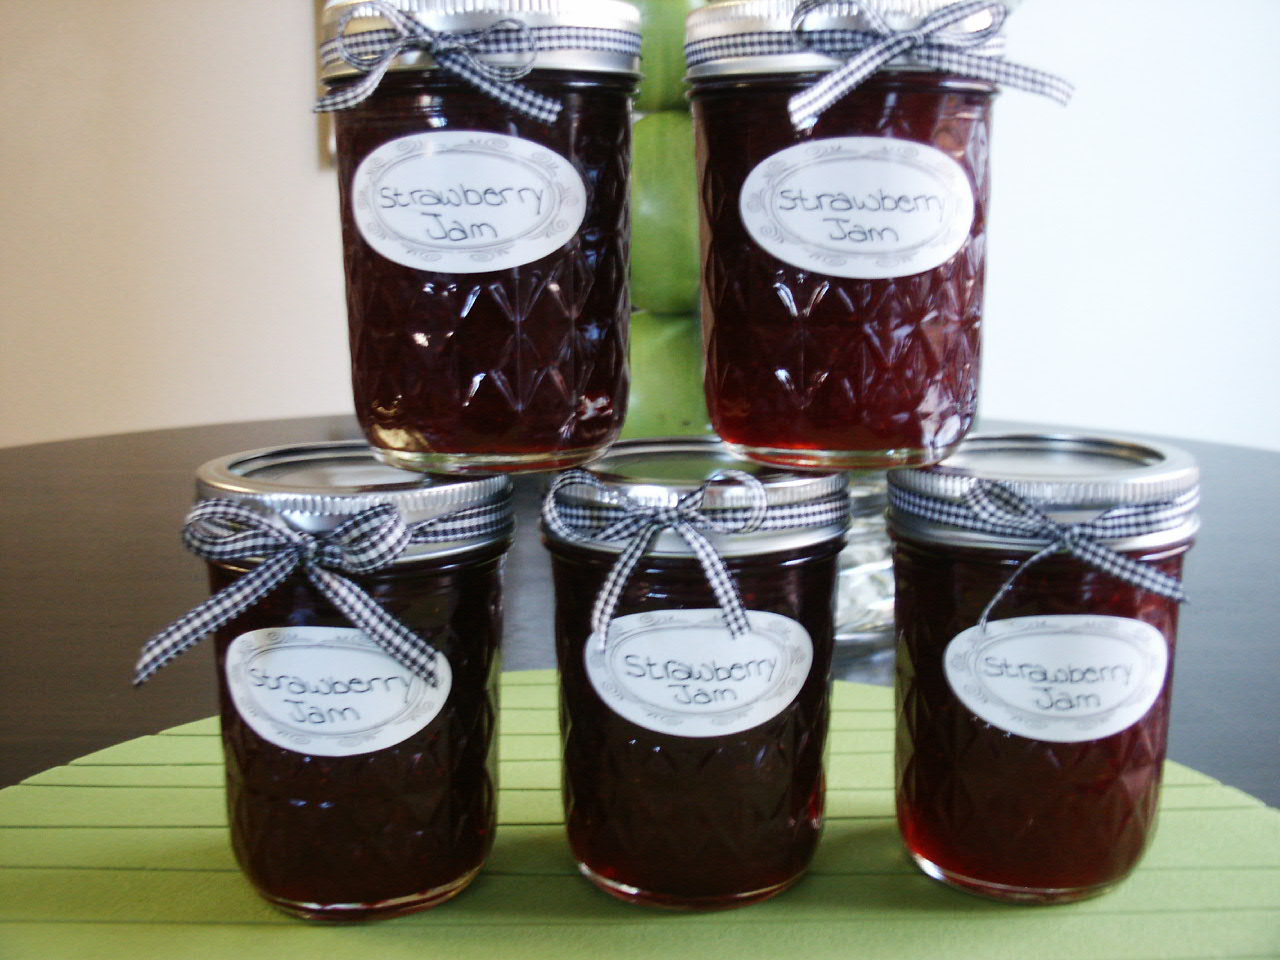
Strawberry Jam


Strawberry jam is the first thing that I learned to can several years ago. Water bath canning, and strawberry jam is a good place to start, and it really isn't as difficult as you may think. Once you make your own homemade jam, you'll never buy store-bought again. Soon you'll be thinking of all kinds of fruits that you can turn into jam... the possibilities are endless. Then there's jellies and syrups...yum!!

It doesn't take much to get started, and most of the things you need are at the hardware store.A large water bath canner with rack, a jar lifter, magnetic wand, wide-mouth funnel, and a canning book. I really like this one.

STRAWBERRY JAM
5 cups fresh strawberries, hulled and mashed
7 cups sugar
4 Tablespoons fresh lemon juice
1 package (49 g) powdered fruit pectin
1/2 Tablespoon unsalted butter
Place 8 or 9 8 ounce canning jars in the water bath canner, fill with water to cover jars, and bring to a simmer.
In a small sauce pan simmer the center lids.
In a large pot or dutch oven (at least 6 quart or larger) add mashed strawberries, lemon juice, pectin, and the butter. Bring to a full boil. Add the sugar all at once and stir to distribute sugar. Bring back to a full rolling boil, and boil for 1 minute, 15 seconds. Turn off heat and skim the foam off the top with a spoon.
Remove one jar at a time from the simmering water. Using the wide-mouth funnel, ladle jam into jar leaving 1/4 inch space at the top.
Run a knife down the side of the jar to remove any air bubbles.
Wipe the rim of the jar with a damp cloth to remove any residue.
Remove center lid from simmering water and place on jar. Put screw bands on jars being careful not to over tighten. Repeat with all the jars. If you end up with a portion of a jar you can use that jar right away (refrigerate). It does not need to go in the canner.
Once all jars are filled, place on canning rack and lower back into the water bathe canner. Cover with lid and bring to a full boil. Boil 10 to 12 minutes. Turn off heat and leave jars in the canner an additional 5 minutes. Remove jars using jar-lifter and leave jars undisturbed for 24 hours.
After 24 hours, remove screw bands and check the seal of the jars. The center lid should have no give. If there are, store those jars in the fridge.

Sunday, June 13, 2010

What's Old is New Again

My new collection is Pyrex. Larry and I have been having fun on our road trips (today we went to Sonora) looking through antique shops, picking up old pieces of Pyrex. These small casseroles are the perfect size. The funny part is Larry used to have the green flowered Pyrex when I met him. Haha, now we are scouting antique shops for it... who would have ever guessed. I'm kind of liking how all the different colors are working together. I think I'm onto a new color scheme for the kitchen....again :)

Thursday, June 10, 2010

Party Tables...My New Obsession

I can't believe the talent that is out there. When did party tables become so incredibly cute? As I've been checking out different blogs, I have discovered that there is a whole world of party blogs out there. You know how it goes...once you find one it takes you to another, and so on and so on. The inspiration is just endless. These accomplished and talented bloggers are all so helpful and willing to share their ideas, their creativeness, and their sources.
There are party tables that feature every kind of party you can think of... whether it's a wedding, shower, birthday party, and even a welcome the puppy party. Here are a few of my favorites that I wanted to share...


THE CANDY BUFFET
This sweet party was created by Glory, http://glorioustreats.blogspot.com/2010/03/candy-party-its-here.html who wanted to do a candy themed party for her daughter. Glory has it all... a candy buffet, a food/dessert buffet, there is a drink buffet.
And she even made all the food herself including the darling cupcakes and cookies. And if Glory wasn't nice enough to share her pictures, she has shared tutorials on her sugar cookies. Go check out her blog for more pictures and some wonderful inspiration of other parties that she created!
FOOD/DESSERT BUFFET


SUGAR COOKIES AND CUPCAKES


SUGAR COOKIES


MILK AND COOKIES PARTY


Anne from A.Party Style, created the most original party for her daughter's first birthday... Milk and Cookies, how cute is that? Why didn't I think of that???
I am immediately drawn to the colors. And who doesn't love milk and cookies?
Takes you right back to your childhood doesn't it?

THE COOKIE TABLE
Anne made all the cookies, and the cake... talk about taking it to the next level. I am definitely signing up for that cake decorating class I've been threatening to take :)
THE BIRTHDAY CAKE


POM POMS
Anne made the pom poms as well, using different shades of brown, white and cream tissue paper.
MILK AND CHOCOLATE MILK


MILK BOTTLES
For more details and pictures be sure to check out A. Party Style
And for more inspiration check out some of Anne's other parties and ideas


KATE'S FAIRY GARDEN BIRTHDAY PARTY
photos courtesy of Vicki Lynn Photography
THE DESSERT TABLE
What little girl wouldn't want this adorable party theme? The very talented Kim from The Tom Kat Studio, which is quickly becoming one of my favorite blogs, put much thought and care into making her daughter's special day memorable. Kim has been very generous with her party planning ideas, sources and inspiration. Please check out her blog for more details of Kate's Fairy Garden Party, and other fabulous parties. Kim also has an Etsy shop with everything you need to plan a memorable party.
With all this inspiration, I think I need to plan a party!

Monday, May 31, 2010

Got Dog Treats?


Dog treats are actually pretty easy to make, and my dogs really do like them better than store bought. Plus it's nice knowing what is in them.

Rosie's Peanut Butter Treats
1 1/2 cups whole wheat flour
1/2 cup all-purpose flour
1 Tbsp. baking powder
1 cup peanut butter
3/4 cup milk
Preheat oven to 400 degrees.
In a large mixing bowl, whisk together the flours and baking powder.
In a medium mixing bowl whisk together the peanut butter and milk until smooth.
Add half of the flour mixture to the peanut butter mixture and mix until combined. Add the rest of the flour mixture and knead on a floured surface for a few minutes.
Roll dough between 1/4 inch and 1/2 inch thickness. Cut into desired shapes. Bake on a silpat lined baking sheet (or parchment paper) about 6 minutes. Depending on size of treats, mine were pretty small. If making larger treats may need to leave in oven up to 15 minutes. Watch carefully. Cool on a rack and store in sealed plastic bags in the refrigerator.

Sunday, May 30, 2010

Mini Key Lime Cheesecakes

Mini Key Lime Cheesecake
for the crust:
1 cup graham cracker crumbs
2 T sugar
pinch of salt
3 T unsalted butter, melted
Preheat oven to 350 degrees. Lightly coat 12 cup mini cheesecake pan with cooking spray. In a medium size bowl, stir graham cracker crumbs, sugar and salt. Add the melted butter and stir until combined. Press equal amounts into bottom of cups and press with a tart tamper Bake 10 min and then cool completely.
REDUCE OVEN TO 300 DEGREES.
for the filling:
16 ounces cream cheese, at room temp.
14 ounce can sweetened condensed milk
3 egg yolks
4 ounces Nellie and Joe's key west lime juice
pinch of salt
Pour condensed milk into blender. Add cream cheese gradually, in small portions and mix until smooth. Add egg yolks and blend well. Add salt and key west lime juice. Continue blending until mixture is smooth. Pour into mini cheesecake pan and bake for 15 to 17 min. Let stand for 10 minutes before refrigerating. Refrigerate overnight. Top with freshly whipped cream, and garnish with fresh lime zest.